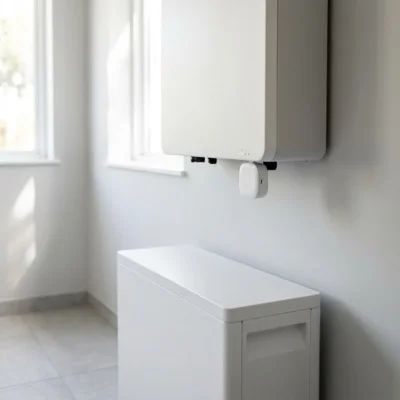
Deye Wi-Fi Logger & Deye Cloud Setup: Key Requirements First
To connect a Deye hybrid inverter to the cloud without retries, check three essentials upfront: your router must broadcast a 2.4 GHz Wi-Fi band (5 GHz is unsupported), the SSID and password should use standard Latin characters without tricky symbols, and first telemetry appears in Deye Cloud within 5–10 minutes of binding. The pairing method depends on your logger hardware revision: classic LSW-3 / LSW-5 stick loggers configure reliably via the local AP_xxxxxxxxxx hotspot and http://10.10.100.254 web portal (admin/admin), whereas newer Bluetooth-assisted modules (such as DD0S... serials) pair directly inside the Deye Cloud app via nearby scan and QR verification.
Quick Checklist: 1) Enable a dedicated 2.4 GHz (802.11 b/g/n) Wi-Fi network. 2) For LSW-3/LSW-5 sticks, joinAP_<SN>, openhttp://10.10.100.254(admin/admin) → Wizard → select 2.4 GHz Wi-Fi → OK. 3) For newer modules, connect your phone to your home 2.4 GHz Wi-Fi, enable Bluetooth, and run Wi-Fi Configuration inside Deye Cloud. 4) Wait for the leftmost NET LED to turn solid, create a plant in Deye Cloud (European and Asian data center), and scan the logger QR code. 5) In Remote Control, always follow Read → edit → Setup → Read.
1. Deye Wi-Fi Logger Revisions You Will Encounter
Every Deye hybrid inverter — from single-phase 5–6 kW units (Deye SUN-5K-SG05LP1-EU, Deye SUN-6K-SG05LP1-EU) to three-phase 12 kW models (Deye SUN-12K-SG04LP3-EU) — ships with an external Wi-Fi data logger that plugs into the bottom communication port. If you are still evaluating models, see our Deye hybrid inverter review and Deye pros and cons breakdown.
- Classic LSW-3 / LSW-5 sticks (10-digit SN, e.g.
2973827632): label and box print the QR code, SN, and AP password (labeled PNC, e.g.WAPWMV-15, or legacy12345678). Supports both10.10.100.254browser setup and app pairing. - Newer Bluetooth-assisted Wi-Fi dongles (e.g.
DD0S...SN): field installers note these typically cannot be configured through the legacy10.10.100.254portal and must be provisioned directly in Deye Cloud via Bluetooth discovery and QR scan.
Photograph the logger label before mounting. You need the serial number both to bind the plant and to request remote firmware updates from Deye support.
2. Network Preparation Before Pairing
- 2.4 GHz only (802.11 b/g/n). Disable Band Steering / Smart Connect or create a dedicated 2.4 GHz SSID if your router merges 2.4 GHz and 5 GHz.
- Clean ASCII SSID and password. Avoid non-ASCII characters, leading/trailing spaces, and unusual punctuation.
- Signal strength at the inverter. Garages and basements attenuate 2.4 GHz rapidly; install a small Wi-Fi repeater if your phone shows only one bar next to the inverter.
- Pause mobile data during AP setup. Phones often drop
AP_xxxxxxxxxxautomatically because it has no internet access; disable cellular data temporarily while using10.10.100.254.
3. Method A: Classic LSW-3 / LSW-5 Setup via 10.10.100.254
- Seat the logger firmly in the inverter port and fasten its retaining screws with the inverter powered on (READY/RUN blinking, COM lit).
- Join the Wi-Fi hotspot named
AP_xxxxxxxxxxmatching your logger serial number, entering thePNCpassword from the sticker/box (or12345678on older units). - Open any browser and navigate to
http://10.10.100.254. - Log in with default credentials: username
admin, passwordadmin(lowercase). - Open the Wizard tab, click Refresh, select your home 2.4 GHz network, enter its password, and leave Obtain an IP address automatically set to Enable.
- On Enhance Security, you may skip initially with Next (and optionally return later to hide the AP or change the web password), then click OK.
- The logger reboots; within 30–60 seconds the leftmost NET LED should stay solid.
4. Method B: Newer Logger Setup via Deye Cloud (Bluetooth / QR)
- Connect your smartphone to your home 2.4 GHz Wi-Fi network first and turn on Bluetooth and Location.
- Open Deye Cloud → top-right menu → Wi-Fi Configuration.
- Select the discovered nearby device (e.g.
DD0S...) or scan the logger QR code for password verification. - Confirm your 2.4 GHz SSID (selecting 5 GHz triggers "5G frequency band is not supported"), enter your router password, and keep the phone close until configuration finishes and the NET LED turns solid.
5. LED Diagnostics (NET, COM, READY) & Reset Button
| LED | Behavior | Meaning | Action |
|---|---|---|---|
| NET (left — router/cloud) | Solid on | Connected to router and Deye Cloud / Solarman server | Normal operation; wait 5–10 min for first data |
| NET | Slow flash (1 s / 1 s) | Connected to router, no cloud server reachability | Check router internet access, DNS, and firewall rules |
| NET | Fast flash (100 ms) | AP configuration / network distribution mode | Complete setup via 10.10.100.254 or Deye Cloud |
| NET | Off | Failed to join Wi-Fi router | Verify 2.4 GHz band, password, signal; factory-reset if needed |
| COM (middle — inverter) | Solid on or slow flash | Active communication with inverter | Normal operation |
| COM | Off | No inverter communication | Reseat logger connector and verify inverter power |
| READY / RUN (right — status) | Slow flash (1 s / 1 s) | Logger operating normally | Normal operation |
| READY / RUN | Fast flash / Off | Fast flash = factory reset; Off = unpowered or fault | Check inverter power or reboot via Reset button |
Reset button timing (official LSW-3/LSW-5 manual): hold ~5 seconds to reboot; hold ~10 seconds until LEDs flash rapidly for a full factory reset (clears old router credentials).
6. Creating a Plant & Binding the Logger in Deye Cloud
- Install Deye Cloud, select the European and Asian data center, and register an account.
- Tap
+→ Create a Plant, enter plant name, address, geolocation, installed inverter capacity (e.g.6kW for Deye 6 kW or12kW for Deye 12 kW), and battery capacity (e.g.5.12kWh for Deye SE-G5.1 Pro-B). - Pick the right Grid Connection Type: choosing Energy Storage on a grid-tied hybrid inverter can display the plant as Off-grid. Select Grid-connected system for grid-tied hybrid sites, or edit it later in Plant Information.
- Tap Add now, scan the logger QR code (or type the SN), confirm, and wait 5–10 minutes for the plant status to switch to Online / Normal.
7. Monitoring Telemetry & Remote Control in Deye Cloud
Open Plant data and tap individual icons to inspect PV1/PV2 voltage and current from your solar panels, grid frequency/voltage, and battery SOC. Note the load distinction: UPS-Load represents critical loads on the inverter backup port (powered by Deye batteries during outages), Load represents non-critical loads upstream of the inverter (visible and PV-offset only when an external CT clamp is installed), and SmartLoad is the controllable auxiliary output.
- Inverter temperatures: navigate to
Device → Inverter / Logger → Device Data → Temperatureto monitor DC Temperature and AC Temperature. Field observation: under heavy loads (>5 kW) without external airflow, DC temperature can climb toward 70–75°C; external cooling fans kept it around 41–47°C in documented field testing. - Per-cell battery voltages: navigate to
Device → Logger → Connection → Battery→ Monomer Information to viewMax Cell V,Min Cell V, and BMS firmware version (e.g.200Con SE-G5.1 Pro-B). - Remote Control / Professional Settings: under
Device → Inverter → Remote Control, always click Read first, modify parameters (Battery SettingincludingDisable float charge = Enablefor LiFePO4,System Work Mode, 6-slotTime of Use,SmartLoad Setup), click Setup, and click Read again to confirm. All commands are audited in Control Log, while Grid Setting remains password-protected.
8. Deye Cloud vs Solarman Smart
Because Deye stick loggers are built on IGEN Tech (Solarman) hardware, the same logger can report to both apps simultaneously. Key practical differences:
| Feature | Deye Cloud | Solarman Smart (+ Business) |
|---|---|---|
| Platform focus | Dedicated solely to Deye inverters and batteries | Multi-brand portal (Deye, Solis, Sofar, etc.) |
| End-user remote settings | Direct Remote Control / Professional Settings (batch and single commands, Time of Use) | Standard Solarman Smart often restricts parameter edits; full access usually requires Solarman Business (pro.solarmanpv.com) |
| Push notifications | Built-in Message Center with configurable grid outage/restoration alerts | Basic alerts; granular grid push notifications are often missing in the Smart app |
| Upload interval | 5 minutes default (reducible to 1 minute via Deye support) | 5 minutes default (follows logger 1-minute setting once changed by Deye) |
| Best for | Most Deye inverter owners | Multi-brand fleets or installers standardized on Solarman Business |
9. Firmware Updates & 1-Minute Interval via Deye Support
End-users cannot flash firmware manually through the mobile app. To update inverter firmware (HMI / MAIN), battery BMS, or shorten the logger interval from 5 minutes to 1 minute (Data Uploading Period: 1Min, Data Acquisition Period: 60s), email service@deye.com.cn or your regional Deye service center with your logger serial number.
- Never cut power during an OTA update. Field observation: temporary
F58 BMS_Communication_Faultand progress codes (A108–A116,B037–B041) may appear on the inverter display while flashing completes. - Local Home Assistant users (port 8899): verify community compatibility before requesting logger-side OTA firmware upgrades, as newer logger builds can alter local port
8899access.
10. Common Mistakes & Field Observations
- Using 5 GHz or merged 2.4/5 GHz Wi-Fi is the #1 pairing failure cause.
- Replacing a logger resets plant history: field observation — cumulative statistics follow the logger SN.
- Normal 1–5 minute lag: cloud values represent the last uploaded packet, not instantaneous inverter screen readings.
11. Sources & Verification
- Official Deye Inverter Technology documentation (
deyeinverter.com): Deye LSW-3 / LSW-5 Stick Logger User Manual and Deye Cloud App User Manual. - Official Solarman platform documentation (
solarmanpv.com) and Deye OTA support policy (service@deye.com.cn). - Field installer & owner video walkthroughs (YouTube): ELTKAR, Енергоклімат, pekaruk, and VM.
Connection procedures, LED tables, and Remote Control workflows were verified against official Deye documentation. Menu labels may vary slightly by app and firmware revision.
Choosing Deye Inverters & Batteries
Our catalog offers Deye hybrid inverters (in stock and to order) including SUN-5K-SG05LP1-EU, SUN-6K-SG05LP1-EU, and three-phase SUN-12K-SG04LP3-EU, alongside compatible Deye batteries such as SE-G5.1 Pro-B and solar panels. Contact our engineers for sizing assistance and commissioning guidance.