Engineering Replacement Guide for Frequency Converters: Migration from Schneider Electric Altivar Process ATV930 to Veichi AC310
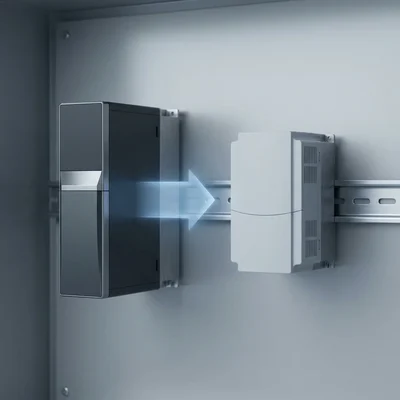
Retrofit and modernization of variable-speed electric drive systems are critically important tasks for maintaining the continuity of technological processes in modern industry. Migrating from the highly reliable but structurally complex Schneider Electric Altivar Process ATV930 frequency converters to the high-performance Veichi AC310 vector drives makes it possible to significantly optimize the space inside control cabinets thanks to the compact book-format design of the latter, while providing flexible control of both asynchronous and synchronous permanent-magnet motors. This two-page engineering manual contains the comprehensive information required for fast physical replacement and software configuration of the equipment directly on site.
Page 1: Comparison of Hardware Interfaces and Control Schematics
Physical replacement of a frequency converter begins with matching the terminal blocks of the control board. Although the Altivar Process ATV930 is designed for complex infrastructure tasks and has a redundant number of integrated interfaces, the Veichi AC310 series offers a rational and compact control-board topology with the option of modular expansion to meet specific industrial requirements.
Visual Mapping of Control-Board Terminal Blocks
To make the work of the installation personnel easier, the topological layout of the main interface terminals for both devices is provided below. The diagrams show the standard control boards in terms of their physical grouping.
| Schneider Electric Altivar ATV930 | Veichi AC310 | ||
| ATV930 terminals | Purpose (ATV930) | AC310 terminals | Purpose (AC310) |
| R1A R1B R1C | Relay 1 (Fault NO/NC/COM) | TA TB TC | Relay 1 (Fault NO/NC/COM) |
| R2A R2C | Relay 2 (NO) | +24V Y | 24 V supply / Digital output Y |
| R3A R3C | Relay 3 (NO) | +10V VS AS | 10 V reference / Input U / Input I |
| STOA STOB 24V | Safe Torque Off / 24 V | AI GNDA AO1 | Universal input / Analog GND / AO1 |
| +10V AI1 COM | 10 V reference / Input U / Ground | X1 X2 X3 | Discrete input 1, 2, 3 |
| AI2 AI3 AQ1 | Universal input / Input I / AQ1 | X4 X5 COM | Discrete input 4, 5 / Ground |
| AQ2 DI1 DI2 | AQ2 / Discrete input 1, 2 | PLC STO1 STO2 | NPN-PNP logic select / STO 1,2 |
| DI3 DI4 DI5 | Discrete input 3, 4, 5 | +24V COM | STO source 24 V / STO ground |
| DI6 DI7 DI8 | Discrete input 6, 7, 8 | ||
Cross-Reference Table of Common Connection Inputs and Outputs
When performing installation work, the control-cable conductors must be reconnected in accordance with the following engineering correspondence table. The data takes into account the electrical characteristics and functional purpose of each terminal:
| Functional group | Altivar ATV930 terminal | Veichi AC310 terminal | Electrical parameters and circuit reconnection notes |
| Power supply | +24V | +24V | Auxiliary 24 V DC power source. On the ATV930 it supplies up to 200 mA, on the AC310 — up to 100 mA. |
| Power supply | COM | COM | Common bus (ground) for discrete signals and the auxiliary 24 V supply. |
| Power supply | +10V | +10V | Reference voltage for connecting an analog setpoint potentiometer. Maximum current: ATV930 — 10 mA, AC310 — 50 mA. |
| Discrete inputs | DI1 | X1 | Multifunction input 1. Default: "Run Forward" command. |
| Discrete inputs | DI2 | X2 | Multifunction input 2. Default: "Run Reverse" command. |
| Discrete inputs | DI3 | X3 | Multifunction input 3. Default: external fault reset (Reset). |
| Discrete inputs | DI4 | X4 | Multifunction input 4. Default: multi-speed mode selection (step 1). |
| Discrete inputs | DI5 | X5 | Multifunction input 5. Can function as a high-frequency pulse input PUL (0...100 kHz). |
| Discrete inputs | DI6...DI8 | X6...X8 (Board) | Requires installation of the AC300IO1 expansion board, since the base AC310 model has only 5 discrete inputs. |
| Analog inputs | AI1 | VS | Analog voltage input. Setpoint range: 0...+10 V DC, impedance 75 kΩ. |
| Analog inputs | AI2 | AI | Universal input. Configured for current or voltage using jumper J1/J2. |
| Analog inputs | AI3 | AS | Analog current input. Default configured for 4...20 mA (impedance 250 Ω). |
| Analog inputs | COM (Analog) | GNDA | Common analog ground for protection against noise and distortion of setpoint signals. |
| Analog outputs | AQ1 | AO1 | Analog output. Software-configurable as 0...10 V voltage or 0/4...20 mA current. |
| Analog outputs | AQ2 | AO2 (Board) | Using the second analog output requires the AC300IO1 expansion board. |
| Relay outputs | R1A/R1B/R1C | TA/TB/TC | Fault output relay. Changeover contact: NO (TA-TC), NC (TB-TC). Max current on the AC310: 3 A (240 V AC). |
| Relay outputs | R2 / R3 | Y / TA2 (Board) | The DQ- logic output on the ATV930 maps to the open-collector transistor output Y on the AC310. |
| Safety (STO) | STOA / STOB | STO1 / STO2 | Safe Torque Off circuits. Safety level SIL3 for both manufacturers. |
Wiring and Conductor Preparation Notes
Before fixing the cables in the terminal blocks, the insulation must be stripped precisely. For the Altivar ATV930 converter the stripping length is 11 mm for relay circuits, 7.5 mm for analog and STO circuits, and 6.5 mm for discrete signal sources. The Veichi AC310, in turn, uses simplified European-type screw terminals that significantly reduce installation time and eliminate the need for strict differentiation of the stripping length, ensuring a reliable contact with standard conductor preparation.
An important step is matching the logic of the discrete inputs. On the ATV930 the choice of Sink (negative logic) or Source (positive logic) is implemented using a configuration switch. On the Veichi AC310 this is done by hardware switching of a jumper between the +24V, PLC and COM terminals. To implement NPN logic (default) the PLC terminal is connected to +24V. If an external controller drives the inverter using positive PNP logic, the jumper must be installed between the PLC and COM terminals.
Page 2: Parameter Configuration, Macros and Motor Auto-Tuning
The commissioning process of the Veichi AC310 in place of the Altivar Process consists of transferring the motor configuration from the simplified menu into the corresponding register parameter groups F00...F02 of the Veichi drive.
Top-10 Popular Parameters for Migration
Below is a comparison table of the most important parameters for both devices that enable the startup of the basic functions of the electric drive:
| No. | Configuration function | ATV930 parameter | AC310 parameter | Value range in Veichi AC310 | AC310 factory value | Engineering description and configuration notes |
| 1 | Motor control mode | Ctt | F01.00 | 0...20 | 0 | 0: Scalar U/f; 1: Sensorless vector (SVC); 2: Vector with feedback sensor (FVC). |
| 2 | Run command source | tCC | F01.01 | 0...3 | 0 | 0: Keypad; 1: Board terminals (X1-X5); 2: RS485 communication; 3: Optional communication board. |
| 3 | Main frequency source | Fr1 | F01.02 | 0...11 | 0 | 0: Digital setpoint; 1: Panel potentiometer; 2: Analog VS (0...10 V); 3: Analog AI. |
| 4 | Number of motor poles | — | F02.01 | 2...98 | 4 | Determined by the formula: P = 120 × f / n, where f is the rated frequency and n is the rated motor speed. |
| 5 | Rated power | nPr | F02.02 | 0.1...1000.0 kW | Depends on model | Rated power of the electric motor in kilowatts, according to its nameplate. |
| 6 | Rated frequency | FrS | F02.03 | 0.01...500.00 Hz | 50.00 Hz | Rated supply frequency of the motor (50.00 Hz or 60.00 Hz for NEMA-type networks). |
| 7 | Rated speed | nSP | F02.04 | 0...60000 rpm | Depends on model | Nameplate rotor rotation speed under rated load (taking slip into account). |
| 8 | Rated current | nCr | F02.06 | 0.1...3000.0 A | Depends on model | Rated motor current for calculating the stator thermal protection model. |
| 9 | Acceleration time | ACC | F01.22 | 0.00...650.00 s | 10.00 s | Time to change the speed from zero to the maximum output frequency. |
| 10 | Deceleration time | dEC | F01.23 | 0.00...650.00 s | 10.00 s | Time to reduce the speed from the maximum frequency to a complete shaft stop. |
To ensure correct limiting of the speed range, additional parameters are used. The minimum operating frequency of the drive is set by parameter F01.13 (the analog of LSP on the ATV930), and the maximum output frequency — by parameter F01.10 or F01.12 (corresponding to HSP in Schneider).
Quick Group Configuration by Process Application (Macros)
To automate and simplify the programming process, the Veichi AC310 implements an automatic configuration function for a specific purpose (for example, a pump, a fan or a conveyor):
Operating profile selection (F00.01): By default the parameter has the value 0 (general-industrial high-overload mode of type G). Setting F00.01 = 1 switches the drive to "P" mode for fans and centrifugal pumps, optimizing energy consumption and reducing dynamic overloads.
Parameter initialization and scaling (F00.03): To automatically apply the optimal parameters for the selected load type, initialization must be performed by setting F00.03 = 11 (type 1 initialization, which restores all parameters to factory defaults except for the entered motor data) or F00.03 = 22. This automatically configures the V/F energy-saving curve, dry-run protections, and the operating logic of the built-in PID controller.
Motor Auto-Tuning Procedure
To achieve high dynamic accuracy, torque stability at low frequencies, and correct operation of the slip-compensation algorithms, after entering the motor nameplate data the auto-tuning procedure must be performed:
Determining the auto-tuning type (F02.07):
- F02.07 = 1 — Rotary tuning: Requires complete mechanical disconnection of the motor shaft from the machine's working element. Provides the highest accuracy of determining the mutual inductance and the no-load current of the electric motor.
- F02.07 = 2 — Static tuning: Allows identification of the stator parameters (active resistance, leakage inductance) without rotating the shaft. Recommended when dismantling the mechanical transmission is impossible.
Starting the identification: After selecting the mode in F02.07 and saving the value with the "ENTER"/"SET" button, the green RUN key on the control panel must be pressed. The display will show an indication of the measurement process, which will go out after the drive automatically returns to the ready state.
Activation and Operating Logic of the Safe Torque Off (STO) Safety System
The Veichi AC310 frequency converter is equipped with a hardware STO safety board that complies with the IEC 61800-5-2:2016 standard and is certified to SIL3 level. The system prevents accidental motor startup by means of a redundant hardware blocking of the control pulses at the gates of the power IGBT transistors. For normal operation of the drive, a 24 V DC voltage must be applied to the STO terminals in accordance with the logic diagram of the device:
| STO1 input state | STO2 input state | PWM output state to motor (PWM Output) | Status code on display |
| Closed to +24V | Closed to +24V | Enabled (Normal drive operation) | Current frequency / Ready |
| Open | Closed to +24V | Blocked (Emergency torque shutdown) | Fault 38.01 (STO Hardware Fault) |
| Closed to +24V | Open | Blocked (Emergency torque shutdown) | Fault 38.01 (STO Hardware Fault) |
| Open | Open | Blocked (STO activated by the safety system) | STO state (Safe stop) |
At factory delivery the STO1 and STO2 terminals are connected by jumpers to the built-in +24V source on the STO board. When integrating into external safety circuits (for example, emergency stop buttons or safety relays) these jumpers are removed, and the connection is made with a shielded cable no longer than 20 m to eliminate induced interference.